Deck Repair
Living in Thornton means dealing with intense sun and snowy winters that can quickly wear down your outdoor living spaces. I know how important a safe, sturdy deck is for enjoying our beautiful Colorado evenings with family and friends.
Fast Response. Clear Answers. Quality Work.
What We Do
Living in Thornton means dealing with intense sun and snowy winters that can quickly wear down your outdoor living spaces. I know how important a safe, sturdy deck is for enjoying our beautiful Colorado evenings with family and friends.
Whether you are finishing a basement or fixing unexpected water damage, smooth drywall is the foundation of a beautiful Thornton home. I understand that dealing with holes, cracks, or unfinished walls can make your living space feel incomplete.
Homes in Thornton go through a lot of wear and tear through the changing seasons, leading to inevitable breakdowns around the house. I know that finding a trustworthy contractor to handle everyday home repairs can be a stressful task.
Routine maintenance is the secret to protecting your Thornton home from our harsh Colorado weather elements. I believe that staying ahead of small issues prevents costly, stressful headaches down the road.
Upgrading your Thornton home with new fixtures, doors, or built-ins adds immense comfort and value to your property. I know that proper installation is critical to ensuring these new additions function perfectly and look incredible.
Whether you are buying a new property or checking up on an older home in Thornton, knowing the true condition of your structure gives you peace of mind. I understand that hidden issues can cause major anxiety for homeowners.
Sudden property damage from severe Thornton storms or unexpected structural failures requires immediate attention. I know how overwhelming an emergency can be, and having a reliable contractor nearby is crucial to protecting your home.
Planning a home improvement project in Thornton starts with understanding the scope and costs involved. I know that finding a contractor who provides clear, upfront pricing is essential for your peace of mind and budget.
Over time, elements of your Thornton home simply wear out and require full replacement to maintain safety and curb appeal. I understand that swapping out old structures for new ones is a big investment in your property's future.
Our Projects
 Featured
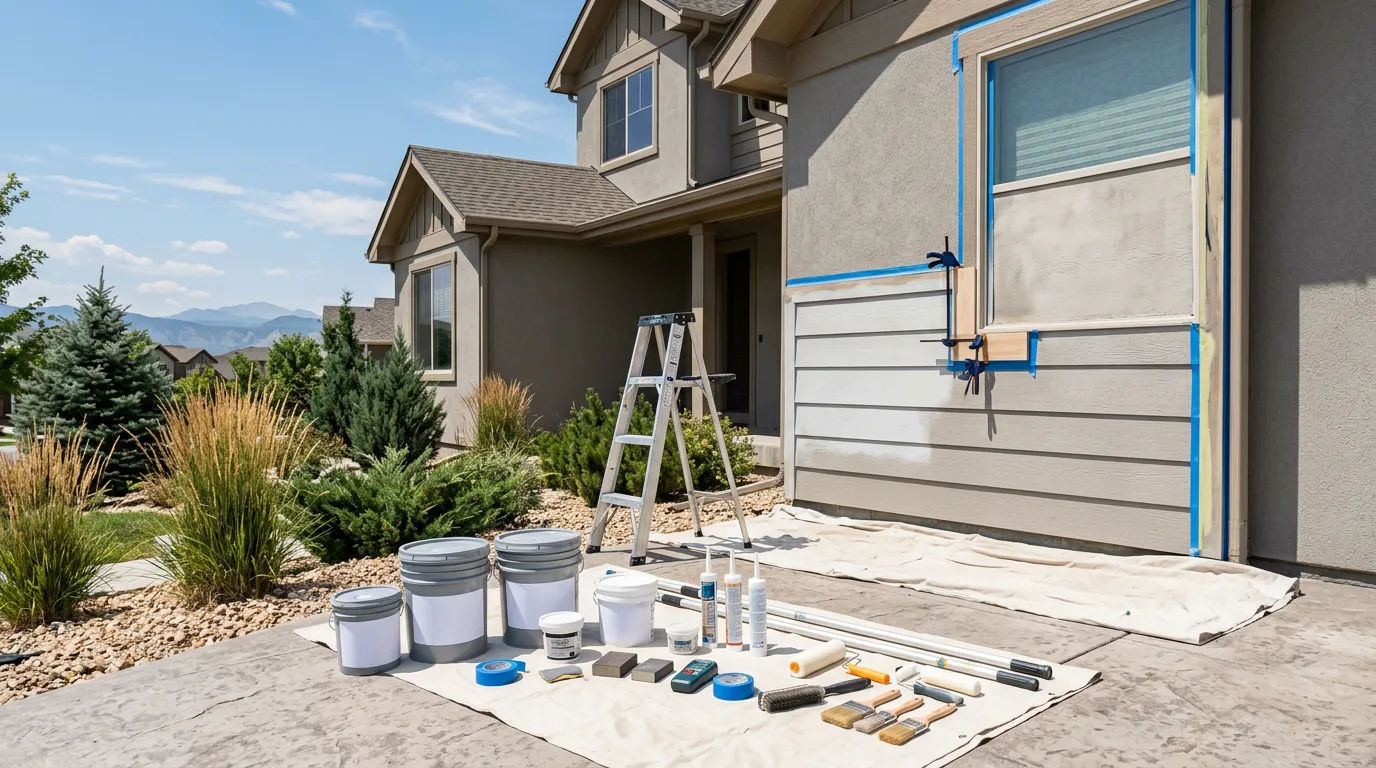
In Thornton’s summer sun, paint systems must handle higher UV exposure and rapid drying; prep quality (not just paint choice) drives both durability and total project cost. · Aug 10, 2026
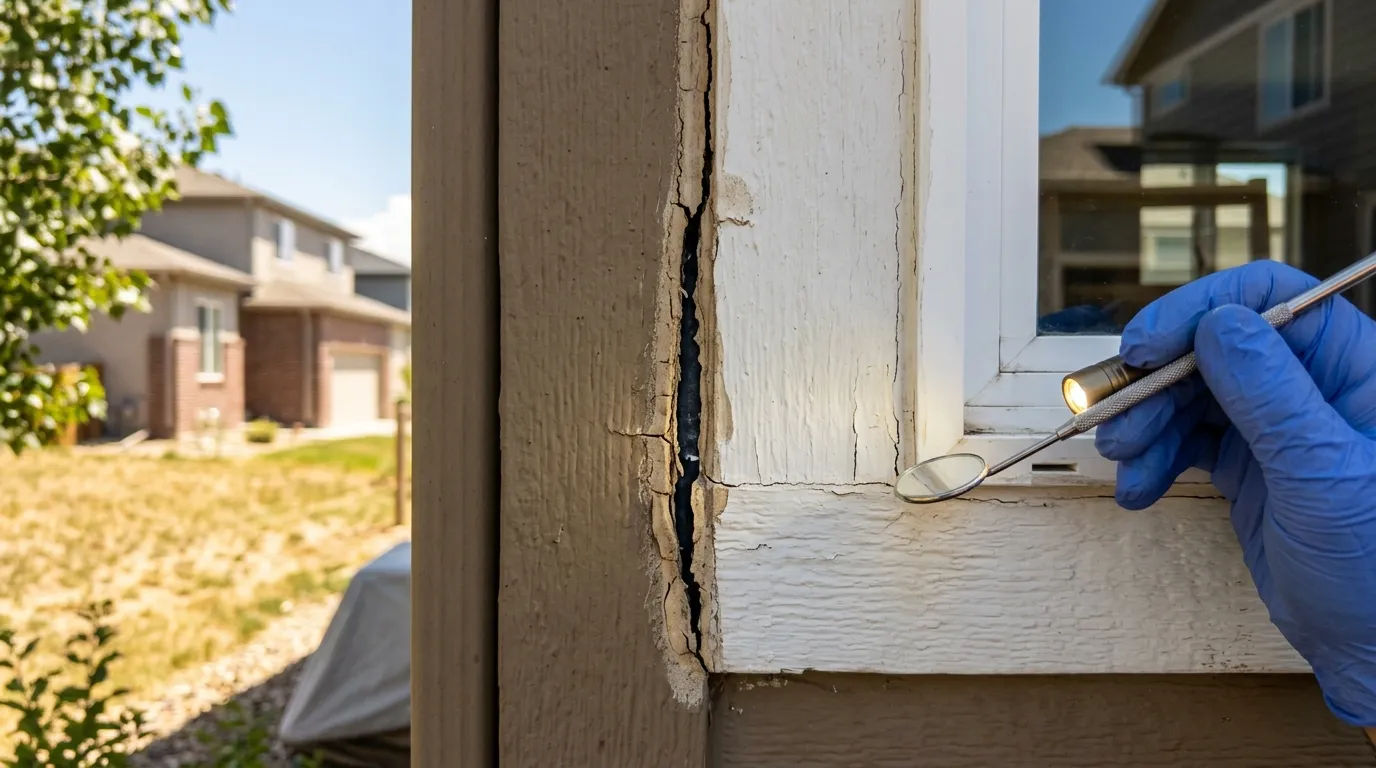
Thornton’s mountain-adjacent elevation means stronger UV, lower humidity, and big day-to-night swings that dry out and crack exterior sealants faster - letting rain and wildfire smoke/ash sneak in. · Aug 3, 2026
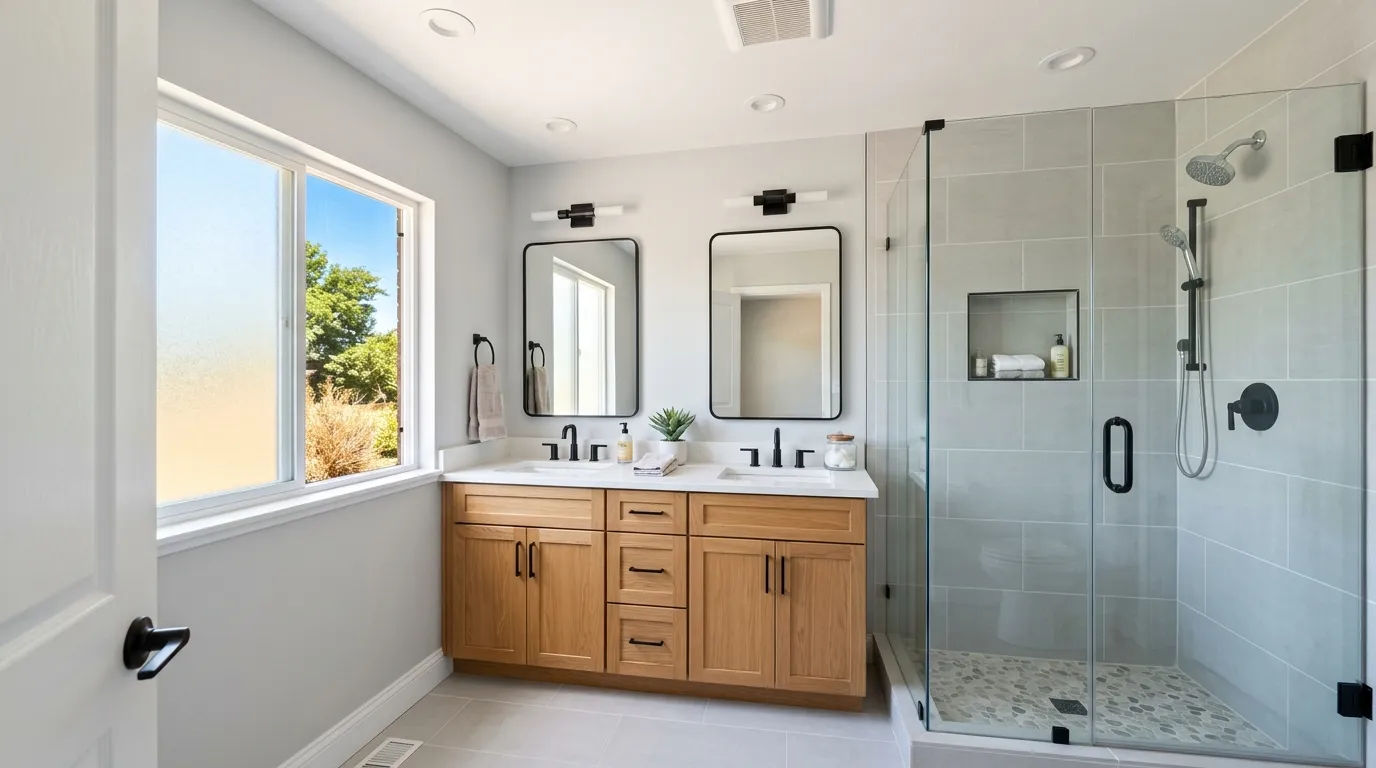
In Thornton, July is peak remodel season - trade availability, inspection lead times, and product shipping windows can make or break a bathroom schedule. Managing coordination tightly helps avoid delays when demand is highest. · Jul 27, 2026
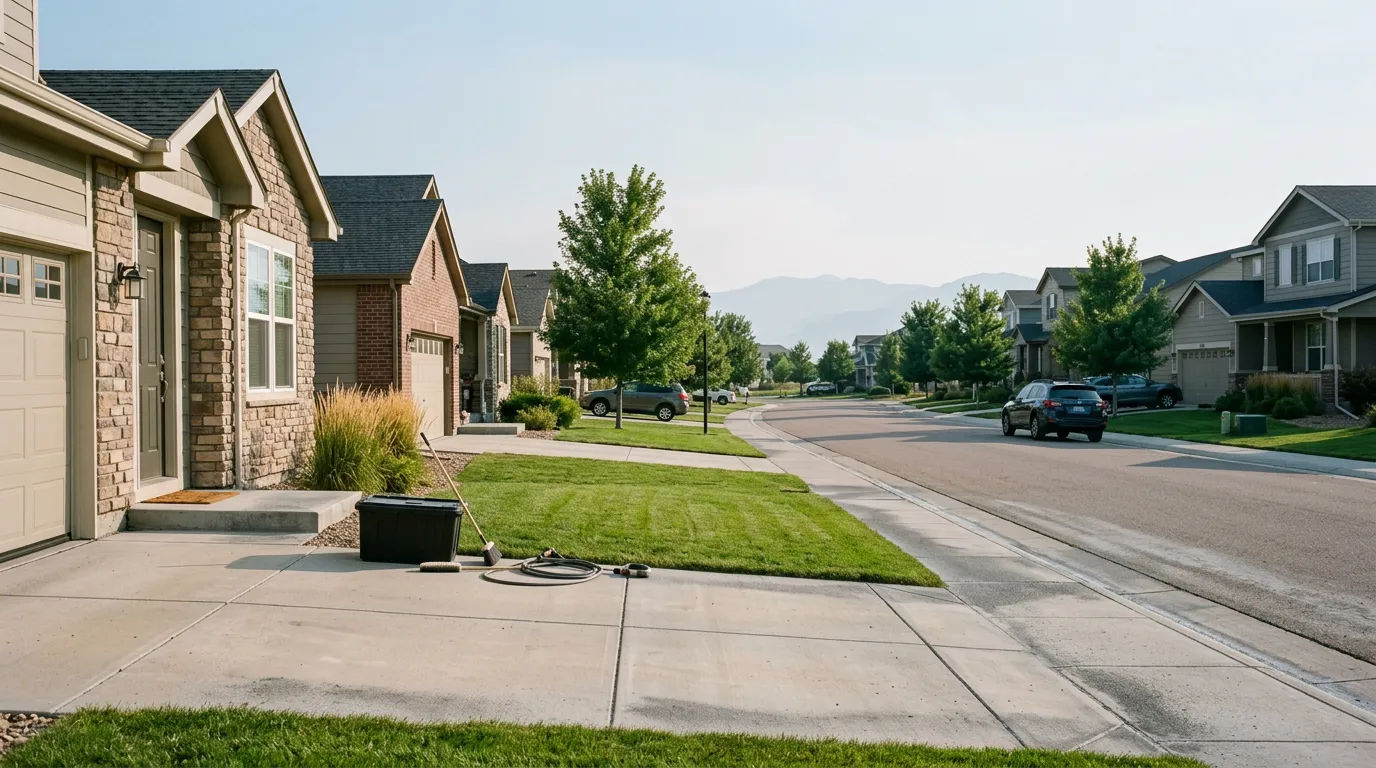
Thornton sits along the Front Range where wind-driven smoke and fine ash can travel far and infiltrate homes through small gaps, attic hatches, and leaky doors - especially during July wildfire season. Dry conditions also make ash more likely to re-circulate around entries and patios. · Jul 20, 2026
8+
Years Experience
Our Difference
I provide comprehensive general contracting services throughout Thornton, from home renovations and additions to commercial buildouts and repairs. With 8 years of hands-on experience and my dedicated team, I focus on clear communication, honest timelines, and delivering craftsmanship that stands the test of time.
I return calls quickly and show up on time because I know your project can't wait.
I provide clear, upfront estimates with no hidden fees so you know exactly what to expect.
With 8 years of experience, I stand behind every project with solid workmanship you can count on.
Built Around Thornton
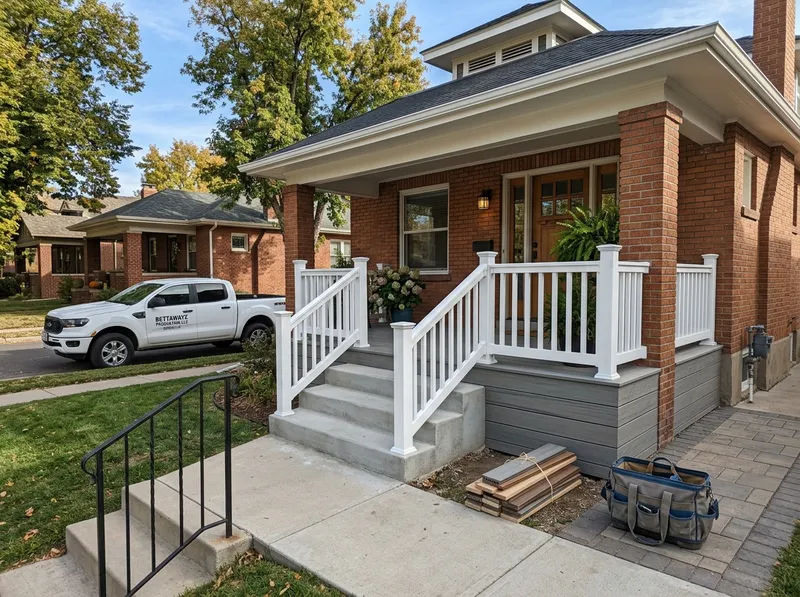
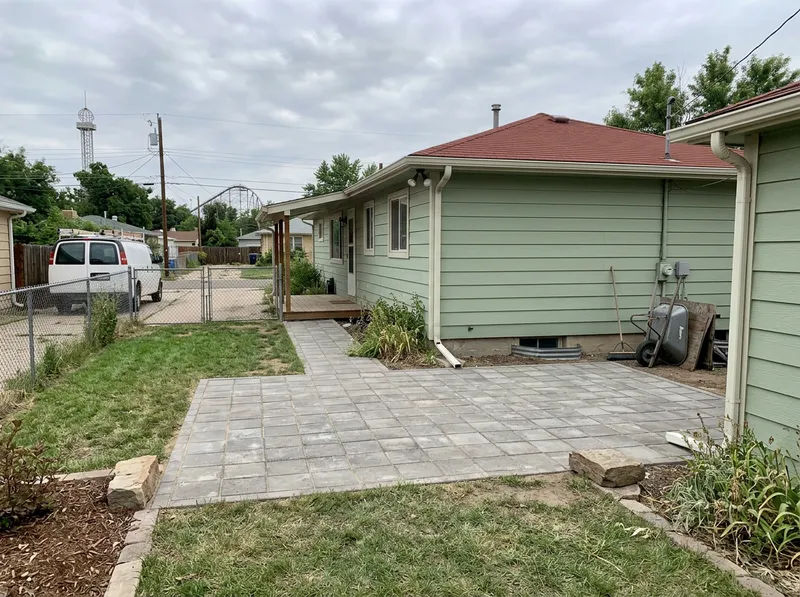
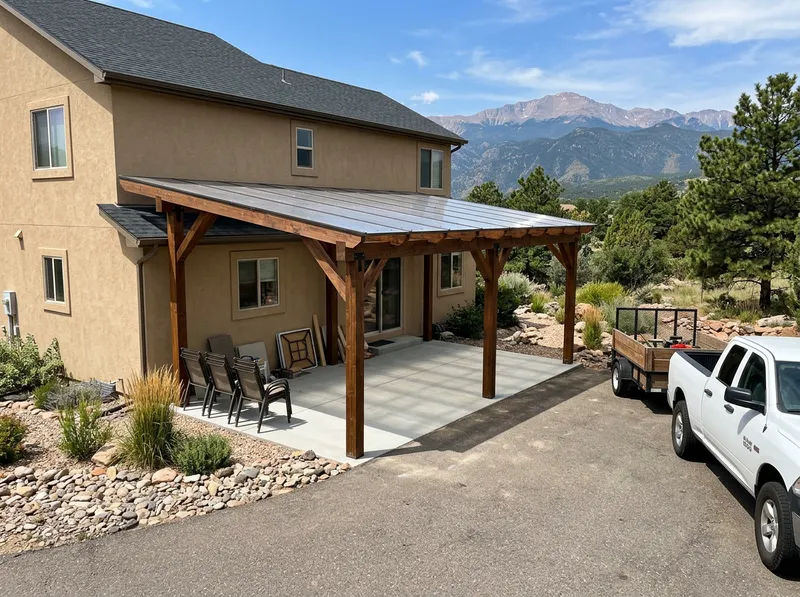
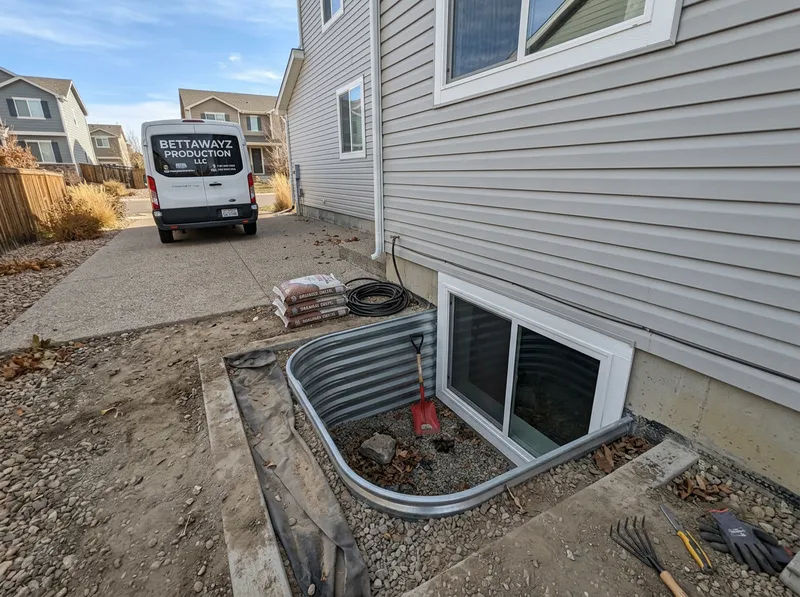
Bettawayz Production LLC delivers clean, durable craftsmanship on real job sites across Thornton and the surrounding Front Range. Here’s a look at recent completed projects - captured the way we document them on-site.
Get a free, no-obligation estimate from our trusted team.
Reviews
We serve Thornton and the entire area with the same premium quality.
Resources
When homeowners in Thornton decide it's time to refresh their home's exterior, the first question is almost always, "What's this going to cost?" It's a completely valid question, and one that deserves a straightforward answer. In my 10+ years managing logistics for production crews, I've learned that a clear budget and a solid plan are the bedrock of any successful project, whether it's a live event or a home renovation. My job has always been about coordinating the details, anticipating challenges, and ensuring the final product is flawless. I bring that same mindset to helping homeowners understand the process. So, let's pull back the curtain on exterior painting costs. I'm not here to give you a sales pitch; I'm here to give you the practical, behind-the-scenes information you need to plan your project with confidence. ## Average Costs in Thornton First, let's talk numbers. Providing a single price is impossible because every home is unique, but I can give you a realistic range based on what my team and I see here in the Thornton area. As you start planning, a **Thornton exterior paint estimate for 2026** will likely fall within these general brackets: - **Smaller Home (approx. 1,500 - 2,200 sq. ft.):** $5,000 - $8,000 - **Medium Home (approx. 2,200 - 3,000 sq. ft.):** $7,500 - $11,000 - **Larger Home (approx. 3,000+ sq. ft.):** $10,000 - $16,000+ Many homes in our newer Thornton and Commerce City neighborhoods, built in the 2010s and later, fall into that larger category. These modern homes often feature complex, multi-gabled rooflines, a mix of materials like fiber cement and stone, and detailed trim work. This architectural complexity naturally places them at the higher end of the price spectrum due to the increased labor involved. These prices typically include thorough preparation, high-quality paint (two coats), and painting of the siding, trim, and fascia. They are a starting point for your budget, but the final number will depend on several key factors. ## Factors That Affect Price The final **exterior painting cost** isn't just about the size of your house. In project management, we call this 'scope of work.' A bigger scope means a higher cost. Here’s what goes into it: 1. **The Condition of Your Home (aka Prep Work):** This is, without a doubt, the single biggest variable. A paint job is only as good as the surface underneath it. In Thornton's intense summer sun, paint takes a beating. The high UV exposure can cause siding to become chalky and brittle, and it can make caulk in the joints fail faster. Proper prep is non-negotiable and includes: - **Power Washing:** To remove dirt, chalk, and loose paint. - **Scraping and Sanding:** To create a smooth, sound surface for the new paint to adhere to. - **Priming:** Applying a spot-primer to bare wood or a full-coat primer to heavily weathered surfaces. 2. **Repairs:** During our initial inspection, we often find areas that need more than just paint. This could be rotted window trim, cracked siding panels, or other minor carpentry needs. Addressing these issues before painting is crucial for a long-lasting result and will be itemized separately in a quote. 3. **Architectural Complexity:** As mentioned, the beautiful, modern homes in our area come with a lot of detail. Multiple gables, dormers, high peaks, and a mix of materials (like stone or brick that needs to be carefully masked off) all require more time, more ladder-work, and more precision from the painting crew. This intricacy directly impacts labor costs. 4. **Trim, Doors, and Accents:** The **cost to prep and paint trim in Colorado** is a significant part of any exterior quote. If you're changing the color of your trim, it requires meticulous cutting-in. Dark trim colors, popular on many 2010s-era homes, may also require specific paint formulations to prevent fading in our sunny climate. Painting doors, shutters, and other accents also adds to the scope. 5. **Type of Paint:** There's a difference between a standard-quality paint and a premium, high-performance coating. For Colorado's climate, I always recommend investing in a top-tier paint. It costs more upfront but provides superior UV protection, color retention, and durability, saving you from having to repaint sooner. ## How to Get the Best Value Everyone wants a fair price, but 'cheap' and 'value' are not the same thing. Value means getting a durable, beautiful result that protects your home for years. Here are some **summer house painting budget tips** to help you get the most for your money: - **Don't Skimp on Prep:** I can't say this enough. A low bid that cuts corners on prep will cost you more in the long run when the paint starts peeling in two or three years. The best value comes from a job done right the first time. - **Get Detailed, Itemized Estimates:** Ask for a quote that breaks down the costs for labor, materials, and any specific repairs. This allows you to compare different bids on an apples-to-apples basis. A transparent contractor will have no problem providing this. - **Be Proactive with Minor Repairs:** If you're comfortable with basic DIY, you can save a little by handling small tasks like replacing a damaged sprinkler head that might spray the house or fixing a loose gutter before the painters arrive. - **Plan Ahead:** July is peak season for exterior work because the weather is ideal. However, this also means painters' schedules fill up fast. By getting estimates and booking your project in the spring, you secure your spot and lock in pricing before any potential mid-season rush. ## Questions to Ask Your Contractor When you're meeting with potential contractors, you are the one in charge. Think of it as an interview. Here are the questions you should ask to ensure you're hiring a true professional: - Can you walk me through your preparation process in detail? - What specific paint products do you recommend for my home, and why? - Are you fully licensed and insured? (Ask to see proof!) - How will you protect my plants, windows, and walkways during the project? - What is your process for handling any necessary wood or siding repairs? - What kind of warranty do you offer on your workmanship and the paint itself? - Will I receive a written, itemized contract before work begins? From my experience on production sets, a team that can answer these questions clearly and confidently is a team you can trust. It shows they have a plan and respect the investment you're making. Choosing to repaint your home is a big decision, but it doesn't have to be a stressful one. By understanding the costs and knowing what to look for in a contractor, you can make an informed choice that adds value and curb appeal to your home for years to come. A quality paint job is an investment in protecting your most valuable asset. For a personalized and detailed estimate in the Thornton area, my team at Bettawayz Production LLC is ready to help. Contact us for a free, no-obligation consultation.
Read MoreFrom my perspective in production and event planning, success is all about managing the details before they become problems. A flawless live stream depends on checking every cable, and a smooth event relies on a solid logistical plan. It’s the same with our homes. You might be sitting on your patio this July, enjoying the intense Colorado sun, and notice something feels off - maybe a faint, smoky smell indoors even though the windows are shut, or an unusual number of ants marching along your window sill. These aren't just minor annoyances; they're often the first whispers of a bigger issue: **exterior caulk failure**. Here in Thornton, our homes take a beating from the environment. The high-elevation sun, dramatic temperature swings, and dry air create a perfect storm for breaking down the sealants that protect your home's outer shell. As a planner, I see this as a critical pre-production check for your home. July is the ideal time to do a thorough walk-around and inspect these crucial seals before the late summer monsoon storms arrive, and before wildfire season is in full swing. Let's walk through the key signs my team and I look for when assessing a property, treating it just like a site survey before a big event. ## Common Signs and Symptoms Think of this as your **summer sealant failure checklist**. Grab a notepad and take a slow walk around the exterior of your home. Pay close attention to windows, doors, trim boards, and where different siding materials meet. These are the joints that rely on flexible sealant to keep the elements out. Here are the seven key signs of trouble: - **1. Visible Cracking and Fissures:** This is one of the most obvious **Colorado UV caulk damage signs**. Look closely at the bead of caulk. Do you see tiny, web-like cracks on the surface? Or are there deep fissures that run the length of the sealant? Healthy caulk should be smooth and uniform. Cracks are a sign that the caulk has lost its flexibility and is becoming brittle. - **2. Gaps and Shrinkage:** Does the caulk appear to be pulling away from the trim or siding? You might see a distinct, dark gap between the sealant and the surface it's supposed to be bonded to. These gaps are direct entry points for moisture, drafts, and pests. This is especially critical around windows and doors, as these **window trim gaps smoke intrusion** pathways can allow smoke and ash from distant wildfires to seep into your home, affecting your indoor air quality. - **3. Hardening and Brittleness:** Gently press on the caulk with your fingernail (in an inconspicuous spot). It should have a slight give, feeling firm but flexible like rubber. If it’s rock-hard and you can’t make an indent, it has lost its elasticity and is no longer able to expand and contract with your home. A brittle sealant will crack under pressure. - **4. Peeling and Flaking:** In advanced stages of failure, you'll see the caulk physically peeling away from the joint in strips or curling up at the edges. Sometimes it looks like old, peeling paint. This indicates a total loss of adhesion, leaving the joint completely exposed. - **5. Evidence of Moisture:** Look for dark stains, water streaks, or even mold and mildew on the siding or trim directly below a sealed joint. This is a red flag that water is already getting behind the failed caulk and into your wall assembly. You might also notice bubbling or peeling paint near these areas. - **6. Unexplained Drafts or Energy Spikes:** Is your air conditioner working overtime this summer? If you feel drafts around windows or exterior-facing outlets, it could be due to failed seals on the outside. Your home’s exterior envelope acts as a barrier, and when it's breached, your HVAC system has to work much harder to maintain a comfortable indoor temperature. - **7. Increased Pest Activity:** If you're suddenly seeing more ants, spiders, or other insects inside your home, check the exterior for their entry points. Those tiny gaps from shrinking caulk are superhighways for pests looking for shelter and food. ## What Causes This Problem Understanding why sealants fail helps you appreciate how harsh our local Thornton climate can be on a home. It’s not just about age; it’s about a constant environmental assault. First and foremost is our intense sun. The Front Range's high elevation means we get a more potent dose of ultraviolet (UV) radiation. UV rays are incredibly effective at breaking down the chemical polymers that give caulk its flexibility and durability. Over time, this constant solar bombardment essentially cooks the sealant, turning it from a pliable barrier into a cracked, useless filler. This is the primary driver behind **Colorado UV caulk damage signs**. Next are the dramatic temperature swings. It’s not uncommon for temperatures to swing 30 degrees or more from day to night. This causes the various materials of your home - wood trim, fiber cement siding, vinyl windows - to expand in the heat and contract in the cool. The caulk in the joints between them is forced to stretch and compress constantly. When it becomes brittle from UV damage, it can no longer handle this movement and simply cracks under the strain. Finally, the original installation plays a huge role. If the previous applicator used a low-quality, cheap caulk, didn't properly clean the joint before application, or applied it in the wrong weather conditions, its lifespan was doomed from the start. A professional application involves meticulous preparation, just like setting up for a major event, to ensure the final product performs as expected. ## When to Call a Professional After your inspection, you might be wondering if this is a project you can tackle yourself. In my line of work, knowing when to delegate to a specialist is key to a successful outcome. **A DIY approach might be suitable if:** - The failure is limited to one or two small, easily accessible areas, like a first-floor window. - You are comfortable with the multi-step process of completely removing the old caulk, cleaning the joint thoroughly, and applying a new bead correctly. - You've done your research and are confident in choosing the right type of high-performance sealant for our climate. **It's time to call an experienced professional when:** - You see widespread **exterior caulk failure** across multiple areas of your home. A systemic problem requires a systemic solution. - The work is on the second story or involves steep rooflines. Safety is paramount, and professionals have the right equipment and training for working at height. - You see signs of water damage, like soft wood or interior staining. This suggests the problem may go deeper than just the caulk, and an expert needs to diagnose the extent of the damage. - You want the peace of mind that comes with knowing the job was done right with the best materials, ensuring maximum protection for years to come. ## Conclusion Just like a production checklist ensures a show goes off without a hitch, your home maintenance checklist protects your biggest investment. This July, take the time to perform that crucial inspection of your home's exterior sealants. Look for the cracks, gaps, and brittleness that signal your home's first line of defense is weakening. Acting early can prevent minor gaps from turning into major problems like water damage, pest infestations, and poor indoor air quality from smoke intrusion. It's a simple, proactive step that ensures your home is prepared for the storms and seasons ahead. If you notice any of these signs, contact a local General Contractor professional for an inspection. They can provide an expert assessment and recommend the best course of action to re-seal and protect your home.
Read MoreIn my line of work, a successful production - whether it’s a live event or a complex video shoot - hinges on meticulous planning. Every minute is scheduled, every piece of gear is accounted for, and every potential problem has a contingency plan. So when a Thornton couple reached out to us in late spring, I immediately recognized the same anxieties I see before a big project. They owned a classic 1950s ranch-style home and dreamed of transforming their cramped, dated primary bathroom. Their biggest fear? Starting a major renovation during the peak July rush and having it drag on for months. They had heard stories of material delays, contractors disappearing for weeks, and the general chaos of summer construction season. They needed a team that could manage the project like a tight production, and they came to **Bettawayz Production LLC** looking for that level of professional oversight. They wanted a beautiful new bathroom, but just as importantly, they wanted peace of mind. This was a classic challenge for any **bathroom remodel Thornton** contractor, and one we were ready to tackle head-on. ## The Assessment When my team and I first walked into the bathroom, it was like stepping back in time. The home, built in the mid-1950s, had its original bathroom intact: pepto-pink 4x4 wall tiles, a bulky cast-iron tub that dominated the small space, and a tiny vanity with almost no counter space. The single-pane window did little to help the dim lighting, and a noticeable lack of ventilation had led to tell-tale signs of moisture issues on the ceiling. Our initial assessment confirmed several key challenges: - **Outdated Plumbing:** Behind the walls, we anticipated finding original galvanized steel or cast-iron pipes, which are prone to corrosion and clogs after 70+ years. This would require a full replacement to ensure long-term reliability. - **Constricted Layout:** The tub/shower combo, toilet, and vanity were arranged in a way that made the room feel incredibly tight. To create the open, spa-like feel the homeowners wanted, we’d need to completely rethink the floor plan. - **Code and Permitting:** A project of this scope, involving changes to plumbing and electrical, requires proper oversight. We explained how we would manage the entire **bathroom remodel permit process Thornton** requires, from submitting the architectural plans to scheduling the necessary inspections with the city. We laid out the good, the bad, and the ugly for the homeowners. We confirmed that a full gut renovation was the right path forward. It was clear that a simple cosmetic update wouldn't address the underlying issues. The team at **Bettawayz Production LLC** believes in doing things right the first time, and that meant starting from the studs. ## Our Solution With the challenges identified, we moved into what I call the “pre-production” phase. Managing a project during the busy season is all about front-loading the work. Our solution was built around a highly detailed plan and proactive coordination. First, we worked with the homeowners to finalize all their material selections weeks before demolition was set to begin. They chose a beautiful large-format porcelain tile for the floor and shower walls, a floating oak vanity to create a sense of space, and sleek matte black fixtures from Moen. By ordering everything immediately, we locked in availability and insulated the project from the supply chain delays common in July. Next, we developed a comprehensive **Thornton CO bathroom remodel timeline**. This wasn't just a rough estimate; it was a day-by-day schedule that coordinated our internal crew with our trusted plumbing and electrical subcontractors. We scheduled the rough-in and final inspections with the city of Thornton well in advance, building buffer days around them to prevent a single delay from derailing the entire project. Once demolition began, our focus shifted to execution and site management. One of the biggest homeowner concerns is mess, so we made **dust control during bathroom renovation Colorado** a top priority. Our crew established a containment zone using ZipWall plastic barriers and laid down heavy-duty floor protection from the front door to the bathroom. We also used a negative air machine with a HEPA filter to scrub the air, ensuring dust and debris were contained to the work area. The homeowners, who were living in the house during the remodel, told us they were amazed at how clean we kept everything. As predicted, we uncovered original galvanized plumbing that was severely corroded. Our licensed plumber was already scheduled and on standby, and he expertly replaced all the old supply and drain lines with durable PEX and PVC. The **Bettawayz Production LLC** crew then framed the new layout, which included a spacious walk-in shower with a built-in bench and niche. We installed a high-powered, quiet Panasonic exhaust fan to solve the ventilation problem for good. Every step, from the waterproofing membrane in the shower to the GFCI outlets, was executed with precision and a focus on quality that defines our work at **Bettawayz Production LLC**. ## The Results The transformation was stunning. In just under four weeks - right on our projected timeline - we turned a cramped, pink relic into a bright, modern, and highly functional retreat. The “before” was a textbook example of a 1950s bathroom; the “after” was a testament to thoughtful design and expert craftsmanship. The final space felt twice as large, thanks to a few key decisions: - **Walk-In Shower:** Replacing the bulky tub with a curbless, walk-in shower featuring a frameless glass panel made the room feel open and accessible. - **Floating Vanity:** The wall-mounted vanity exposed more floor space, visually expanding the room and making it easier to clean. - **Strategic Lighting:** We installed recessed LED lighting in the ceiling, a stylish sconce above the new mirror, and a dedicated waterproof light in the shower. The room went from dim and shadowy to bright and inviting. The homeowners were ecstatic. They couldn't believe we had delivered such a high-quality result on schedule during the busiest month of the year. They told us that the constant communication and the cleanliness of the job site made the entire process stress-free. For me and my team at **Bettawayz Production LLC**, that’s the ultimate measure of success. We didn’t just build a new bathroom; we delivered a smooth, professional, and positive renovation experience. ## Conclusion This Thornton project is a perfect example of how challenges like a tight schedule, an old home, and peak-season demand can be overcome with rigorous planning and expert execution. It proves that a major remodel doesn't have to be a chaotic nightmare. By treating every project like a full-scale production, **Bettawayz Production LLC** ensures every detail is managed, every timeline is respected, and the final result exceeds expectations. We take immense pride in our local reputation for quality and reliability. Ready for your own **Bettawayz Production LLC** experience? Contact us today for a free inspection.
Read MoreAs a production specialist here in Thornton, my job is all about planning for the unexpected. On a video set, you have to anticipate everything from a sudden change in light to a piece of gear failing. Over my 10+ years working across the Front Range, I’ve learned that the same principle applies to our homes, especially when July rolls around. One minute you’re enjoying a clear blue sky, the next you can smell the smoke from a wildfire miles away. It’s a reality of living in our beautiful state, and it’s why my team and I believe so strongly in being prepared. Here in Thornton, we're not surrounded by dense forests, but we are directly in the path of the prevailing winds that sweep down the Front Range. This means that when fires spark in the foothills or mountains, we are often the recipients of smoke and, more insidiously, fine ash. This isn't just a minor inconvenience; it's a significant air quality issue and can cause real problems for our homes and our health. Thinking about **wildfire ash protection** isn't alarmist; it's just smart planning for a Thornton homeowner. ## Thornton Weather Challenges Living in Thornton gives us fantastic views and access to everything the Denver metro area has to offer. But our position along the Front Range corridor also presents unique environmental challenges. The primary issue during wildfire season is the transportation of particulate matter over long distances. The smoke we see is obvious, but it’s the microscopic ash particles that can infiltrate our homes most effectively. These particles are so fine that they can easily pass through tiny, unsealed gaps around windows, doors, and utility penetrations. They can get sucked into your attic through vents and settle on every surface, eventually making their way into your living space. At **Bettawayz Production LLC**, we see this often in Thornton, where even newer homes can have dozens of small air leaks that act as entry points for smoke and ash. Another factor is our dry climate. When ash settles on driveways, patios, and roofs, it doesn't always get washed away quickly. Instead, wind, foot traffic, or even just opening a door can kick it back up into the air, creating a cycle of re-contamination right at your doorstep. This is why a comprehensive approach that includes both sealing your home and planning for safe cleanup is so critical. ## Best Practices for Local Homeowners Just like preparing a set for a shoot, protecting your home is about a series of small, deliberate actions that add up to a big difference. You can significantly improve your home's resilience to wildfire smoke and ash with a few key upgrades and a solid plan. ### Seal Your Home's Envelope The most effective first step is to **seal air leaks wildfire smoke Front Range** homes are prone to. Your goal is to create a tighter building envelope that gives you more control over your indoor air quality. - **Doors and Windows:** Check the weatherstripping around all exterior doors and windows. If it's cracked, compressed, or missing, replace it. This is a simple DIY job that offers a huge return. For the bottom of doors, consider installing or replacing door sweeps to seal the gap at the floor. - **Attic Hatches and Recessed Lighting:** These are often overlooked sources of major air leakage. Use foam weatherstripping to create a tight seal around your attic access panel. For older recessed can lights, you can purchase specially designed covers to seal them from the attic side. - **Utility Penetrations:** Look for gaps where pipes, vents, and electrical conduits enter your home. These are common in basements, crawl spaces, and under sinks. Use caulk or expanding foam sealant (read the instructions carefully!) to close them off. ### Protect Your HVAC System Your heating and air conditioning system is your home's respiratory system. During a smoke event, it can either be your best friend or your worst enemy. The key is to **protect HVAC intake from ash Colorado home** systems require. - **Upgrade Your Filter:** The standard, cheap fiberglass filters do very little to stop fine ash particles. Upgrade to a filter with a MERV (Minimum Efficiency Reporting Value) rating of 13 or higher. This will capture a much larger percentage of airborne contaminants. Be sure to check what your system can handle, as higher MERV ratings can restrict airflow. - **Know Your Fresh Air Intake:** Some HVAC systems have a fresh air intake that pulls outdoor air inside. During a smoke event, you should close this vent if possible. If you're unsure where it is or how to operate it, consult your HVAC manual or a professional. The team at **Bettawayz Production LLC** recommends identifying this *before* you need it. - **Run the Fan:** When smoke levels are high outside, keep your windows and doors closed and run your HVAC fan continuously. This will circulate the indoor air through your high-MERV filter, effectively scrubbing the air inside your home. ### Your Post-Ashfall Cleanup Plan Once the air has cleared, you'll need to clean the ash that has settled on and around your property. Rushing this can be counterproductive and even hazardous. Here is a basic **ash cleanup checklist Thornton CO** residents can follow: - **Wait for Calm Conditions:** Don't start cleaning on a windy day. You'll just be chasing the ash around. - **Gear Up:** Always wear a well-fitting N95 or P100 respirator mask, gloves, and eye protection. Fine ash contains particulates that are harmful to your lungs. - **Avoid Leaf Blowers:** Never use a leaf blower to clean up ash. This will just aerosolize the fine particles and spread them everywhere, creating a bigger problem and a serious health hazard. - **Clean from the Top Down:** Start with your roof, if you can do so safely. Gently sweep or use a low-pressure water rinse to guide the ash into your gutters. Clean the gutters next. - **Exterior Surfaces:** For siding, decks, and patios, a gentle rinse with a garden hose is usually sufficient. Avoid high-pressure washing, which can drive fine particles into siding and other materials. - **Landscaping:** Lightly rinse ash off plants and trees. A gentle shower from a hose is all that's needed. ## Local Resources and References Being prepared also means knowing where to get reliable, real-time information. During a wildfire event, I always keep an eye on a few key resources. The Adams County government website and the Thornton Fire Department are excellent sources for local emergency alerts and safety recommendations. For air quality, the state's official monitoring site and resources like AirNow.gov provide up-to-the-minute data on particulate levels in our area, which can help you decide when it's best to stay indoors. ## Choosing a Local Expert While many of these prep tasks are manageable for a dedicated homeowner, sometimes you need a professional eye to identify the less obvious vulnerabilities in your home. That’s where having a trusted, local partner makes all the difference. As an owner-operated company, my team and I at **Bettawayz Production LLC** pride ourselves on our commitment to our Thornton neighbors. We're not a faceless corporation; we live here, we work here, and our reputation is built on every project we complete. When you're dealing with something as important as your home's safety and your family's health, you want to work with someone who understands the specific challenges of our area. **Bettawayz Production LLC** has served Thornton homeowners for years, helping them prioritize the highest-impact upgrades for their budget, from comprehensive air sealing projects to coordinating safe and effective exterior wash-downs after an ashfall event. ## Your Partner in Home Protection In production, success is all about proactive planning and having the right team. The same is true for protecting your home. Taking steps now to seal air leaks, protect your HVAC system, and create a cleanup plan will give you peace of mind when the summer skies turn hazy. You can’t stop the wildfires, but you can absolutely control how prepared your home is to handle them. My team and I are passionate about helping our neighbors feel safe and secure in their homes. If you have questions about where to start or want a professional assessment of your home's vulnerabilities, please don't hesitate to reach out. When it comes to **wildfire ash protection** in Thornton, Bettawayz Production LLC has the local expertise and neighborly approach you can trust.
Read More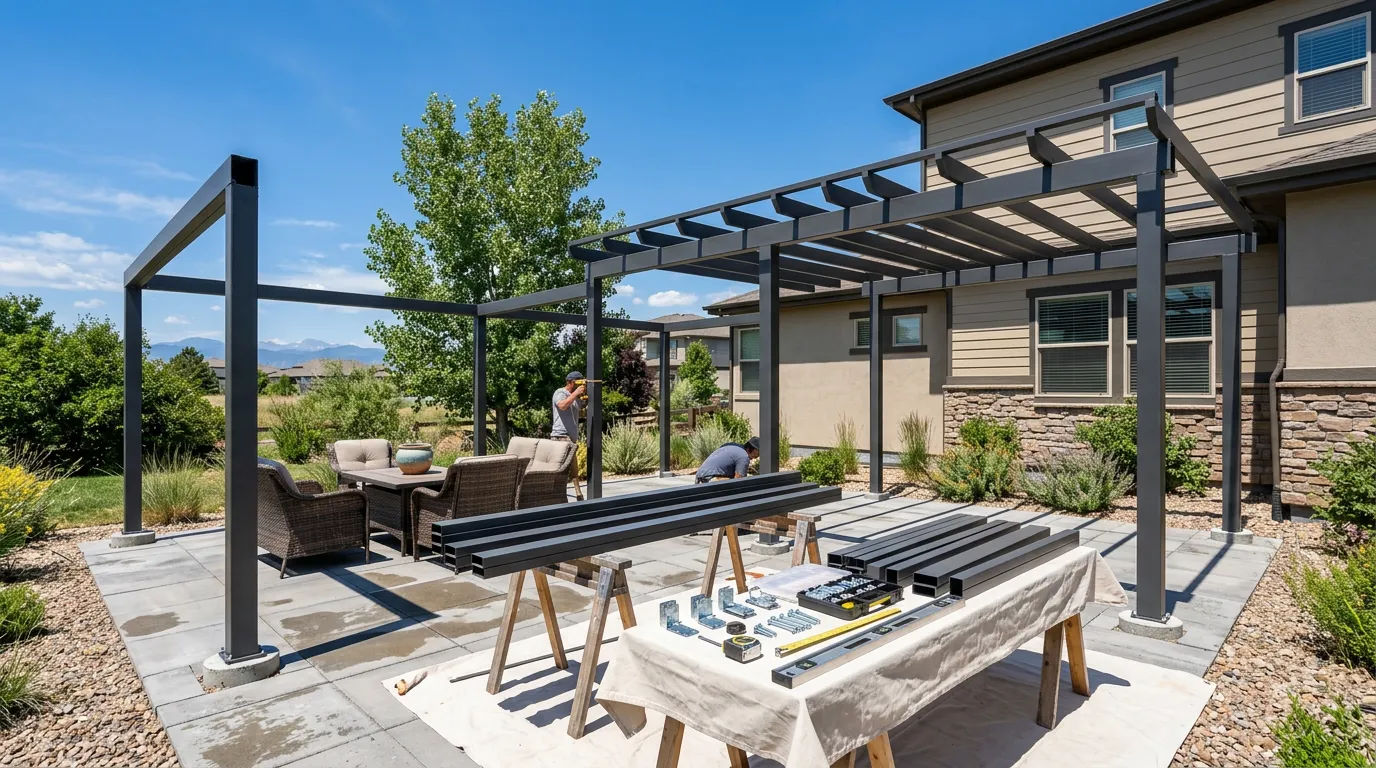
Hi, I’m Marissa. For the last decade, I’ve been coordinating the behind-the-scenes magic for live events and video productions here in the Thornton area. My world is all about planning, logistics, and making sure every piece comes together on time and on budget. I’ve learned that whether you’re setting up for a live stream or adding a structure to your home, the most common question is always the first one: “What’s this going to cost?” It’s a fair question, and one that deserves a straightforward answer. When it comes to adding a patio cover, the price isn't just a number plucked from thin air. It's a reflection of materials, safety, and craftsmanship. Here in Thornton, we get intense high-elevation sun and wild summer thunderstorms, so a patio cover isn’t just a luxury - it’s a practical way to make your outdoor space usable all summer long while protecting your deck and furniture from harsh UV rays. My goal is to pull back the curtain and give you a realistic look at the costs so you can plan your project with confidence. ## Average Costs in Thornton Let’s get right to it. The **patio cover cost** can vary widely based on your vision, but I can give you some realistic ballpark figures for our local area. Think of these as starting points for your budget planning. - **Standard Aluminum Patio Covers (10'x20'):** For a basic, high-quality aluminum cover, you can generally expect a price range of **$8,000 to $15,000**. These are popular for their durability and low-maintenance appeal, making them a fantastic “set it and forget it” option. - **Custom Insulated or Composite Covers (10'x20'):** If you're looking for something more substantial, perhaps with insulated roof panels that reduce heat transfer, you might be looking at **$15,000 to $25,000**. These structures offer enhanced comfort and can often support features like ceiling fans and integrated lighting. - **Custom Wood Patio Covers (10'x20'):** For a classic pergola or a solid-roof structure made from cedar or Douglas fir, the **aluminum vs wood patio cover price in Colorado** definitely tilts higher for wood. Expect a range of **$18,000 to $30,000+**. The craftsmanship is more intensive, and the material itself carries a premium, but the aesthetic is timeless. Remember, these are just averages. A smaller, simpler project could cost less, while a large, complex design with all the bells and whistles will cost more. ## Factors That Affect Price Just like in event production, the final cost comes down to the details. Several key factors influence the price of your patio cover, and understanding them is crucial for setting a realistic budget. - **Size and Design:** This is the most obvious factor. A larger, more intricate design will require more materials and more labor, increasing the cost. A simple square or rectangular cover will be more budget-friendly than one with multiple angles or a unique roof pitch. - **Materials:** As mentioned above, the material you choose is a major cost driver. - **Aluminum:** Generally the most cost-effective option. It’s lightweight, won't rust or rot, and comes in various finishes. It’s perfect for homeowners who want shade without the ongoing maintenance of wood. - **Wood:** Offers a natural, beautiful aesthetic that many homeowners love. However, it requires regular staining or sealing to protect it from Colorado’s harsh sun and moisture. The initial cost is higher, and you should factor in long-term maintenance. - **Composite/Vinyl:** These materials often fall somewhere in the middle. They mimic the look of wood without the high maintenance but can be more expensive than aluminum. - **Engineering and Permitting:** This is a big one that homeowners sometimes overlook. In our area, a patio cover is a structural addition that must be built to code. This means it needs to be designed to handle specific wind speeds and, crucially, heavy snow. A proper **snow load patio cover in Thornton, CO** isn't optional - it's a requirement for safety and longevity. This often requires engineered plans and a building permit from the county. The **permit cost for a patio cover in Adams County** itself isn't huge, but the process of creating compliant plans and passing inspections adds to the overall project cost. A professional contractor will handle all of this for you. - **Foundation and Site Work:** Your patio cover needs a solid foundation. If you have an existing concrete patio in good condition, the posts can often be anchored directly to it. However, if the slab is cracked or not thick enough, or if you're building over pavers or bare ground, new concrete footings will need to be poured. This adds labor and material costs to the project. - **Custom Features:** Want to add electrical for a ceiling fan, recessed lighting, or outdoor speakers? These upgrades will increase the final price but can dramatically enhance the functionality of your new space. ## How to Get the Best Value Getting the “best value” isn’t about finding the cheapest price; it’s about making smart investments that give you a durable, beautiful, and safe final product. From my experience on set, I know that cutting corners early on always leads to bigger problems later. - **Prioritize Durability Over Frills:** If your budget is tight, focus your spending on a strong structure and quality, low-maintenance materials like aluminum. You can always add features like fancy lighting later. - **Plan Thoroughly:** Know what you want before the work begins. Just like a last-minute script change in a production, changing the design mid-project is one of the fastest ways to drive up costs. A clear plan saves everyone time and money. - **Consider Long-Term Costs:** A wood cover might seem appealing, but are you prepared for the time and cost of re-staining it every few years? An aluminum cover might have a similar upfront cost but will require almost no financial investment down the road. - **Hire a Reputable Professional:** A qualified contractor knows the local codes, handles the permitting, and builds the structure correctly the first time. The peace of mind that comes from knowing your patio cover won't collapse under a heavy snow or get ripped up by a summer storm is priceless. Our team at Bettawayz Production LLC prides itself on building things the right way, ensuring your investment is safe and secure. ## Questions to Ask Your Contractor Empower yourself by asking the right questions. Before you sign any contract, make sure you're comfortable with the answers to these: 1. **Are you licensed and insured to work in Thornton, CO?** 2. **Is the quote all-inclusive? Does it cover materials, labor, and the permit fees?** 3. **Will the design be engineered to meet the specific snow load and wind requirements for my address?** 4. **Who is responsible for pulling the permit from Adams County?** 5. **What is the estimated timeline from start to finish?** 6. **Can you provide an itemized breakdown of the costs?** 7. **What warranties do you offer on the materials and your workmanship?** Building a patio cover is an investment in your home and your quality of life. By understanding the costs and asking the right questions, you can approach the project with clarity and confidence. It’s about creating a space where you can relax and make memories for years to come, knowing it was built right. For a personalized estimate in Thornton, contact Bettawayz Production LLC for a free consultation. My team and I are happy to walk you through all the options and help you design the perfect shade solution for your home.
Read More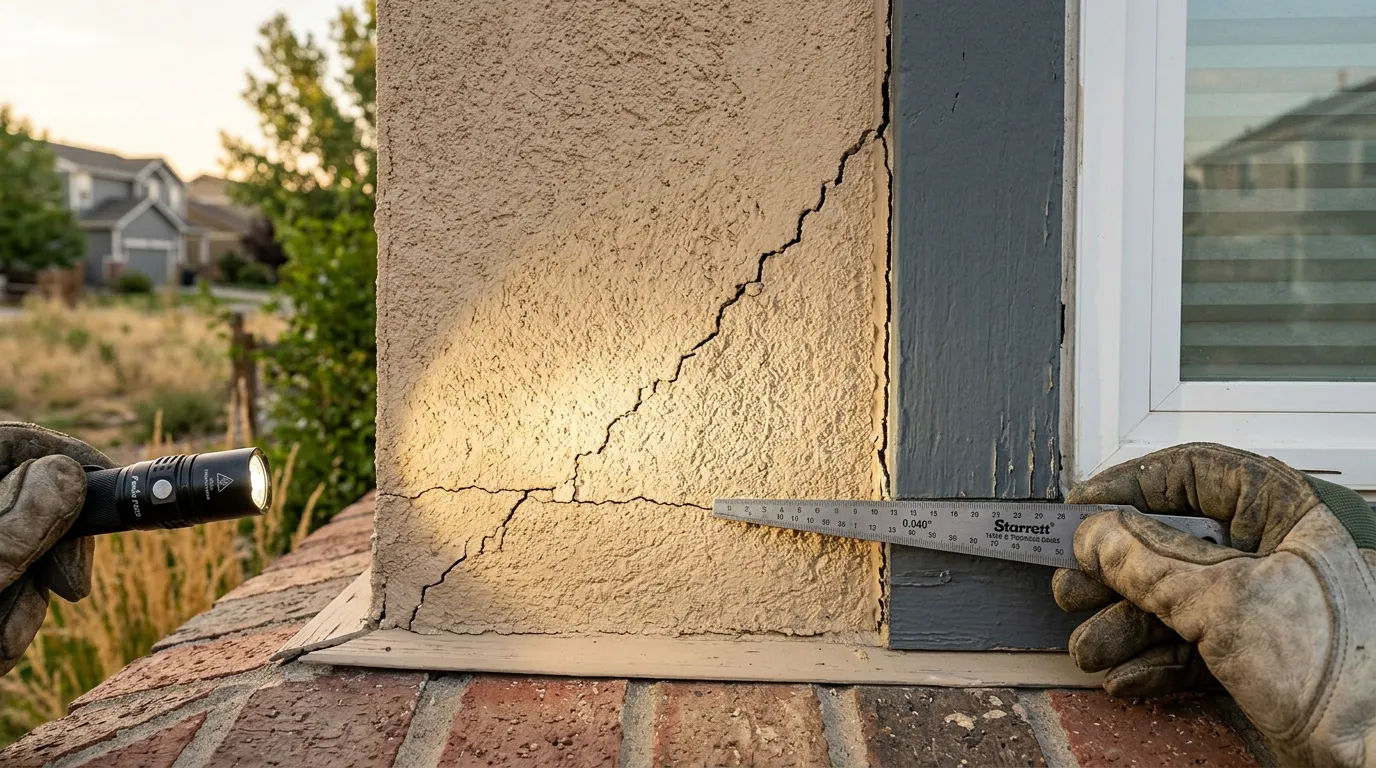
In my line of work with production and live events, my whole job revolves around planning for the unexpected and paying obsessive attention to the details. My team and I spend weeks mapping out every cable, every light, and every potential point of failure. That mindset has trained my eye to spot the little things that can become big problems. It’s a habit I can’t seem to turn off, even when I’m home in Thornton. The other evening, enjoying that perfect July temperature drop after a hot day, I noticed it: a fine, web-like crack spreading across a neighbor’s stucco wall, glinting in the last light of the day. It’s a sight that’s becoming more common across the Front Range, and it’s a direct result of our unique Colorado climate. That beautiful, dramatic temperature swing we love - from 90 degrees in the afternoon sun to a cool 55 degrees at night - puts incredible stress on the exterior of our homes. This phenomenon leads to what are known as **thermal shock cracks**, and they are something every homeowner here should be aware of. ## Common Signs and Symptoms Knowing what to look for is the first step in protecting your home. I always tell my team that a good site walk is critical, and the same applies to your own property. Take a slow walk around your home’s exterior, paying close attention to the south and west-facing walls, as they bear the brunt of the afternoon sun. Bring a credit card with you as a simple measuring tool. Here’s what you should be looking for: - **On Stucco:** This is one of the most common places to see issues. Look for fine, hairline cracks that can look like a spiderweb. You might also see longer, more defined vertical or horizontal cracks, often originating from the corners of windows and doors. These are classic signs of **thermal expansion cracks stucco Thornton** homeowners frequently encounter. If the stucco feels soft, sounds hollow when you tap it, or has a chalky residue, it could indicate water has already gotten behind it. - **On Masonry (Brick & Stone):** Check the mortar joints between your bricks or stones. The most common pattern you’ll see is a “stair-step” crack that follows the path of least resistance along the mortar lines. While less common, a vertical crack that runs straight through the bricks themselves is a more serious sign that warrants immediate attention. - **On Wood Trim and Siding:** Your home’s paint is its first line of defense. Look for paint that is cracking, blistering, or peeling away from the wood. Pay special attention to the joints where two pieces of trim meet or where trim meets the siding. You might see gaps opening up. Check the caulking around windows, doors, and vents. If it’s dried out, brittle, and cracked, it’s no longer creating a waterproof seal. ## What Causes This Problem Understanding the “why” behind these cracks is key. The root cause is a simple law of physics: thermal expansion and contraction. When materials get hot, they expand. When they cool down, they contract. Our intense Colorado sun can heat the surface of a wall to well over 100 degrees, causing it to swell on a microscopic level. Then, as the sun sets and the cool mountain air rolls in, the surface temperature can plummet by 40 degrees or more in just a few hours. This rapid contraction is the “shock” in **thermal shock cracks**. Think of it like bending a paperclip back and forth. The first few times, nothing happens. But with enough repetition, the metal fatigues and eventually snaps. The **day night temperature swing home damage Colorado** experiences is that same repetitive stress on your house. Every single day, your home’s exterior is expanding and contracting. To make matters more complex, different materials expand and contract at different rates. The stucco, the wood trim, the glass in the window, and the metal flashing all move at their own pace. This differential movement creates immense stress at the points where these materials meet, which is why we so often see cracks starting at the corners of windows and doors. Over years of this daily cycle, the materials fatigue, and a crack is born. ## When to Call a Professional Once you’ve identified a crack, the next question is always: “Is this a big deal?” This is where knowing **how to tell if exterior cracks need repair** is crucial. Some minor issues can be monitored, but others require immediate action to prevent water intrusion and more significant damage down the road. Here’s a simple guide to help you decide: **Consider Monitoring or a Small DIY Fix If:** - The crack is purely cosmetic, like a hairline crack in a top layer of paint that doesn’t go through to the material underneath. - The crack is smaller than the width of a credit card (less than 1/16th of an inch) and doesn't appear to be growing. - A small bead of caulk around a window has a minor split. This can often be scraped out and replaced with a high-quality, flexible sealant. **You Should Call a Professional For an Assessment If:** - **The Crack is Wider Than a Credit Card:** This is a clear sign that the gap is significant enough to allow water entry. - **The Crack is Getting Longer or Wider:** If you notice a crack changing over the course of a few weeks or months, it indicates an active problem that won't fix itself. - **You See Stair-Step Cracks in Masonry:** This can sometimes point to foundation movement or settling, and it’s essential to have an expert diagnose the root cause. - **Water is Getting In:** If you see water stains on your interior drywall or ceiling near the location of an exterior crack, you have an active leak that needs to be addressed immediately. - **The Stucco is Damaged:** If the stucco around the crack is bulging, soft, or crumbling, it means the underlying structure is compromised and a simple patch job won't be enough. An experienced professional won't just slap some filler in the crack. My team and I know that proper prep is everything. A pro will diagnose the underlying cause, determine if there's a deeper structural or moisture issue, and use the correct materials and techniques to create a durable, flexible repair that can withstand our local climate's demands. ## Conclusion Living in Thornton means we get to enjoy incredible weather, but that same weather asks a lot from our homes. The intense sun and dramatic temperature swings are constantly testing your home's exterior. Those small cracks you see today are more than just a cosmetic issue; they are potential entry points for water, especially with late-summer storms on the horizon. What starts as a tiny **thermal shock crack** can lead to wood rot, mold, and significant structural damage if left unaddressed. Taking a few minutes this weekend to inspect your home's exterior is one of the smartest investments you can make. Catching these issues early is far less disruptive and expensive than dealing with the consequences of water damage later. Don't wait for a small problem to become a big headache. If you notice any of these signs, contact a local General Contractor professional for an inspection.
Read More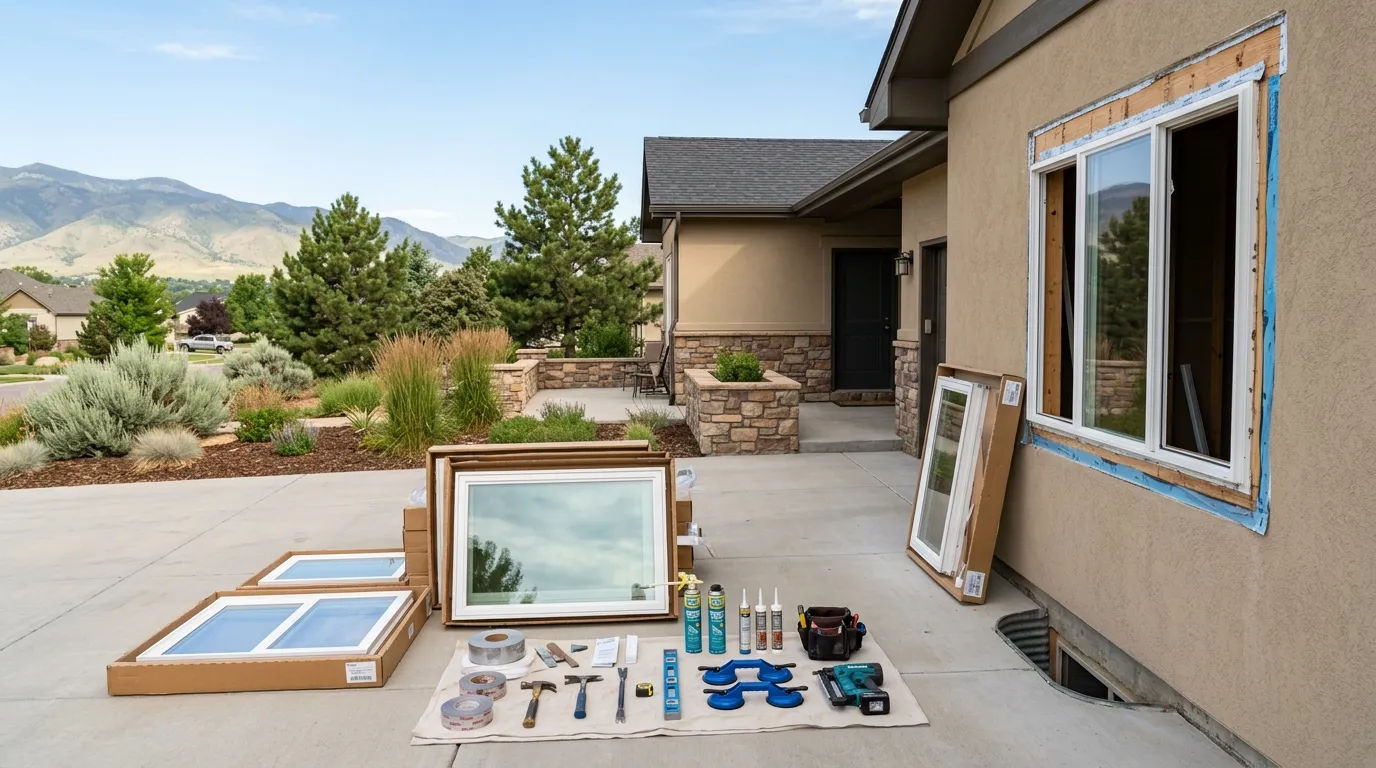
Hi, I'm Marissa. For the last decade, my work has been all about managing productions - video shoots, live streams, and events right here in Thornton and across the Front Range. My world is one of budgets, schedules, and making sure the right crew has the right gear to get the job done flawlessly. It might seem like a leap from a production set to your living room, but I’ve learned that the principles of a successful project are the same everywhere. Cost is always a top concern, and a clear plan is the only way to avoid surprises. That’s why I want to talk about one of the most common questions my team and I hear as we head into summer: “How much will new windows actually cost?” It’s a simple question with a complex answer, but my goal here is to give you the transparent, behind-the-scenes information you need to build a realistic **window replacement budget Colorado Front Range**. ## Average Costs in Thornton Let’s get right to it. In the Thornton area, prices can vary, but I believe in being direct. When you’re planning for a professional window replacement, you’re paying for both a quality product and the skilled labor to install it correctly. Here are some realistic budget ranges you can expect this summer. - **Per-Window Cost (Installed):** For a standard-sized, double-hung, vinyl Low-E window, you can generally expect the cost to be between **$950 and $1,850 per window**. This price typically includes the window itself, removal of the old window, professional installation, and basic exterior trim and sealing. - **Triple-Pane Upgrade:** For a **triple-pane window install Thornton CO**, you should budget about 15-25% more per window. While the upfront cost is higher, the improvement in energy efficiency and sound reduction is significant, which many homeowners find worthwhile. - **Whole-Home Project:** For a typical 1950s ranch-style home in our area with 8-12 windows, a full replacement project could range from **$8,000 to $22,000+**. This is a wide range because, as we’ll discuss next, the details matter immensely. June is a popular month for this work. The weather is stable, which is ideal for sealing and finishing, and homeowners are eager to upgrade before July and August's peak heat. At Thornton's elevation, the summer sun is intense, and upgrading to **UV-blocking windows for mountain homes** can make an immediate difference in your home's comfort and your AC bill. ## Factors That Affect Price Just like in a production, the final cost depends on the “gear” you choose and the complexity of the “shoot.” Here are the primary drivers behind your final quote. - **Window Material:** Vinyl is the most common and cost-effective option. Fiberglass is a step up in price and durability, offering a longer lifespan and better performance in our climate's temperature swings. Wood windows are the most expensive, offering classic aesthetics but requiring more maintenance. - **Glass Package (The Most Important Part!):** This is where the real performance comes from. - **Low-E Coatings:** This is a non-negotiable for Colorado. A microscopic metallic coating on the glass reflects infrared light (heat) and UV rays. A good **low-E window cost** is an investment in lower energy bills and protecting your furniture and floors from fading. - **Double-Pane vs. Triple-Pane:** Standard new windows are double-pane. Triple-pane adds another layer of glass and an insulating gas-filled chamber, dramatically improving insulation (R-value) and blocking outside noise. - **Gas Fills:** The space between the panes is typically filled with an inert gas like Argon or Krypton, which insulates better than regular air. - **Installation Type & Complexity:** - **Insert vs. Full-Frame:** An insert (or pocket) replacement fits a new window into the existing frame. It’s faster and less expensive. A full-frame replacement removes everything down to the rough opening, which is more expensive but allows the crew to address any rot or insulation issues. - **Building Era:** Many homes in our area date back to the 1950s and 60s. These homes often have non-standard window sizes that require custom orders. Furthermore, when we remove an old window from a post-war home, we sometimes find rotted wood or a complete lack of insulation around the frame. A full-frame replacement is often the best choice for these older homes to ensure a modern, airtight seal. - **Window Style and Customizations:** A simple, fixed picture window will cost less than a large bay window or a casement window with complex hardware. Custom shapes, colors, and interior grids will also add to the final price. ## How to Get the Best Value Getting the “best value” isn’t about finding the cheapest price; it’s about making the smartest investment for your home. From my production experience, I know that cutting corners in pre-production always leads to problems on set. - **Prioritize Performance:** The difference in comfort and energy savings between a builder-grade window and a high-performance Low-E, triple-pane window is something you will feel every day. The energy savings over the life of the window often justify the higher initial cost. - **Consider a Phased Approach:** You don't have to replace every window at once. If your budget is tight, start with the windows that get the most intense sun - typically those on the south and west sides of your house. You can tackle the others in a year or two. - **Check for Rebates and Credits:** Always check with your utility provider (like Xcel Energy) for potential rebates on energy-efficient upgrades. There are also sometimes federal tax credits available for installing high-performance windows. A good contractor should be knowledgeable about these programs. - **Get Detailed, Itemized Quotes:** Don’t accept a quote written on the back of a business card. A professional quote will break down the cost of materials, labor, and any optional add-ons. This allows you to compare apples to apples. ## Questions to Ask Your Contractor Vetting your crew is the most important job of any producer. You need to know who you’re trusting with your project. Here are the questions you should ask any contractor before signing a contract. - **Is this quote for an insert or a full-frame replacement?** - **What are the NFRC ratings (U-Factor and SHGC) of the proposed windows?** (This shows you’ve done your homework!) - **What is your warranty on the installation labor, and what is the manufacturer’s warranty on the window itself?** - **Are you fully licensed and insured to work in Thornton? Can I see proof?** - **What steps do you take to protect my home (floors, furniture, landscaping) during the installation?** - **What does the price include? Does it cover removal and disposal of the old windows?** - **What is the estimated timeline from signing the contract to project completion?** Planning a home renovation is a major undertaking, but it doesn't have to be overwhelming. Just like with my productions, it all comes down to a solid plan, a clear budget, and a trustworthy team. Investing in quality, **UV-blocking windows for mountain homes** is one of the best upgrades you can make for comfort and efficiency in the Front Range. If you're ready to start planning and want a clear, detailed estimate for your project, my team at **Bettawayz Production LLC** is here to help. Contact us for a free, no-pressure consultation to discuss your options.
Read More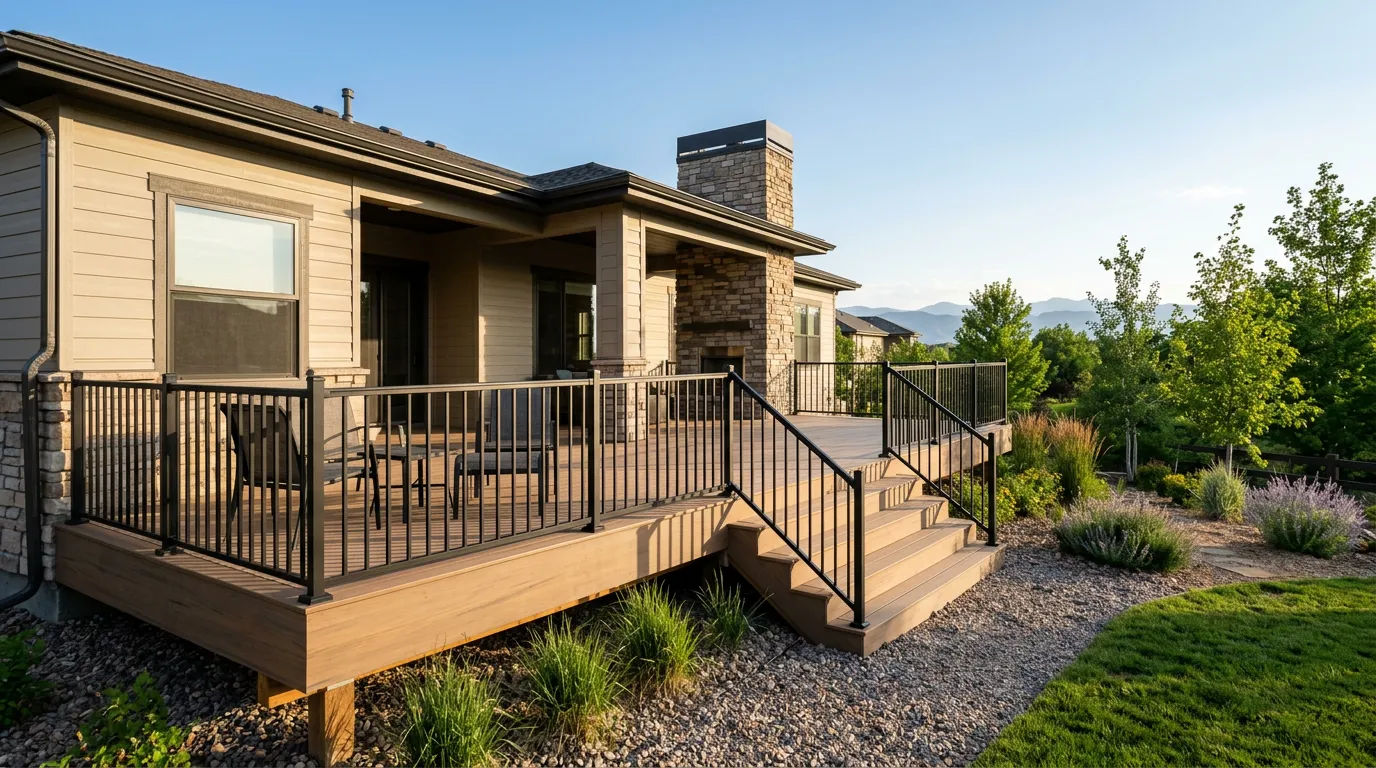
In my line of work - producing live events and video shoots - you learn that a successful outcome is 90% preparation. The other 10% is executing that plan flawlessly. It’s a lesson that applies perfectly to the world of general contracting, as our team at **Bettawayz Production LLC** recently demonstrated on a project in Thornton. It all started with a call from a homeowner. They had a classic early-2000s deck, likely original to their Neo-traditional style home. It had served them well for years, but now it was a source of constant anxiety. The wood was splintered and faded, the railings felt loose, and every spring meant another weekend lost to pressure washing, sanding, and staining. More pressing, however, was their growing concern about wildfire risk. With summer approaching, they dreamed of enjoying their backyard, but the thought of their aging wooden deck acting as a tinderbox was a constant worry. They needed a solution before the peak of summer, and they needed a team they could trust. ## The Assessment When my team and I arrived for the initial consultation, it felt like a site scout for a complex production. We weren't just looking at the surface; we were evaluating the structure, the environment, and the potential risks. The homeowner’s concerns were immediately validated. The deck, built with pressure-treated pine common in the 90s and 2000s, was showing significant signs of wear. The boards were cupping, creating uneven surfaces, and years of Colorado’s intense sun and freeze-thaw cycles had left the wood brittle. From a safety perspective, the issues were even more critical. Here’s what we documented: - **Combustible Materials:** The entire structure was made of wood, a highly combustible material that can easily ignite from wind-blown embers. - **Ember Traps:** There were significant gaps between the deck boards and between the deck and the house siding. These spaces are notorious for trapping embers, allowing them to smolder and ignite the structure long after a wildfire has passed. - **Vulnerable Underside:** The area beneath the deck was open, collecting dry leaves and pine needles. This debris pile was essentially kindling sitting directly under the home’s exterior. - **Outdated Vents:** We also inspected the home’s foundation and crawl space vents near the deck. They were standard, wide-mesh vents that would do little to stop a flurry of embers from entering the home's substructure. It was clear this wasn't just a cosmetic issue. For this Thornton family, a simple repair wasn't enough. They needed a comprehensive **wildfire-ready deck rebuild** to give them true peace of mind. This is where the planning expertise of **Bettawayz Production LLC** truly comes into play. ## Our Solution Just like mapping out a multi-day event, we created a detailed project plan. Our goal was not just to build a new deck, but to create a beautiful, low-maintenance, and fire-resistant outdoor living space. The project was scheduled for early June, the perfect window to complete a **deck rebuild before wildfire season Thornton** really kicks into high gear. Our approach was methodical and focused on ignition-resistant principles: 1. **Deconstruction and Site Prep:** Our 5-person crew began with a swift and clean deconstruction of the old deck. We contained the debris and removed all the old wood, leaving a clean slate. We then thoroughly cleared the under-deck area of all organic debris. 2. **Structural Integrity:** We inspected the original concrete footings. Finding them sound, we were able to build upon them, saving the homeowner time and money. We then framed the new deck using pressure-treated lumber for the substructure, ensuring it was properly flashed with non-combustible material where it met the house to create a critical fire-blocking barrier. 3. **Ignition-Resistant Materials:** This was the core of the project and what makes this an **ignition-resistant decking Thornton case study**. We guided the homeowners toward a high-performance composite decking material with a Class A fire rating - the same rating given to materials like concrete and brick. This composite decking is not only incredibly durable and resistant to ignition, but it also eliminates the need for yearly staining and sealing. 4. **Ember-Resistant Detailing:** A fire-wise deck is all about the details. We installed the new decking with minimal, consistent gaps to prevent ember trapping. We then installed a beautiful, fire-resistant skirting around the perimeter of the deck, enclosing the underside to prevent debris accumulation and deny embers a place to land. As a crucial final step in our **ember-resistant vents retrofit Colorado** service, we replaced the old foundation vents with new, 1/8-inch metal mesh vents, effectively hardening this vulnerable entry point to the home. Throughout the 4-day project, the **Bettawayz Production LLC** team operated with the precision of a seasoned production crew. Our worksite was kept organized, and we communicated with the homeowner daily, ensuring they were informed and comfortable. For us, minimizing disruption is just as important as the quality of the final product. ## The Results The transformation was stunning. The old, weathered, and worrisome deck was gone. In its place stood a sleek, modern, and incredibly solid outdoor oasis. The composite decking, in a rich color that complemented the home's siding, created a high-end look that immediately elevated the entire backyard. But the most significant result wasn't just visual. It was the palpable sense of relief from the homeowners. The “before” was a deck that represented a chore and a liability. The “after” is a deck that represents relaxation, family time, and security. They now have: - **Peace of Mind:** Knowing their deck is built with top-rated ignition-resistant materials provides invaluable comfort during Colorado’s dry summers. - **A Maintenance-Free Lifestyle:** No more staining, sanding, or replacing rotted boards. A simple soap and water wash is all that’s needed. - **Increased Home Value:** A modern, safe, and beautiful composite deck is a significant value-add for any home, offering a substantial return on investment. - **An Expanded Living Space:** The deck is no longer a place to avoid, but a true extension of their home where they can host barbecues, enjoy their morning coffee, and relax on long summer evenings. The homeowner told us, “We can’t believe the difference. It’s more than just a deck; it’s a weight off our shoulders. The crew from **Bettawayz Production LLC** was professional, efficient, and their attention to the fire-safety details was exactly what we were looking for.” This project is a perfect example of the thoughtful and thorough work we pride ourselves on at **Bettawayz Production LLC**. We don't just build things; we solve problems and deliver lasting value for our neighbors here in the Thornton community. Ready for your own **Bettawayz Production LLC** experience? Contact us today for a free inspection.
Read More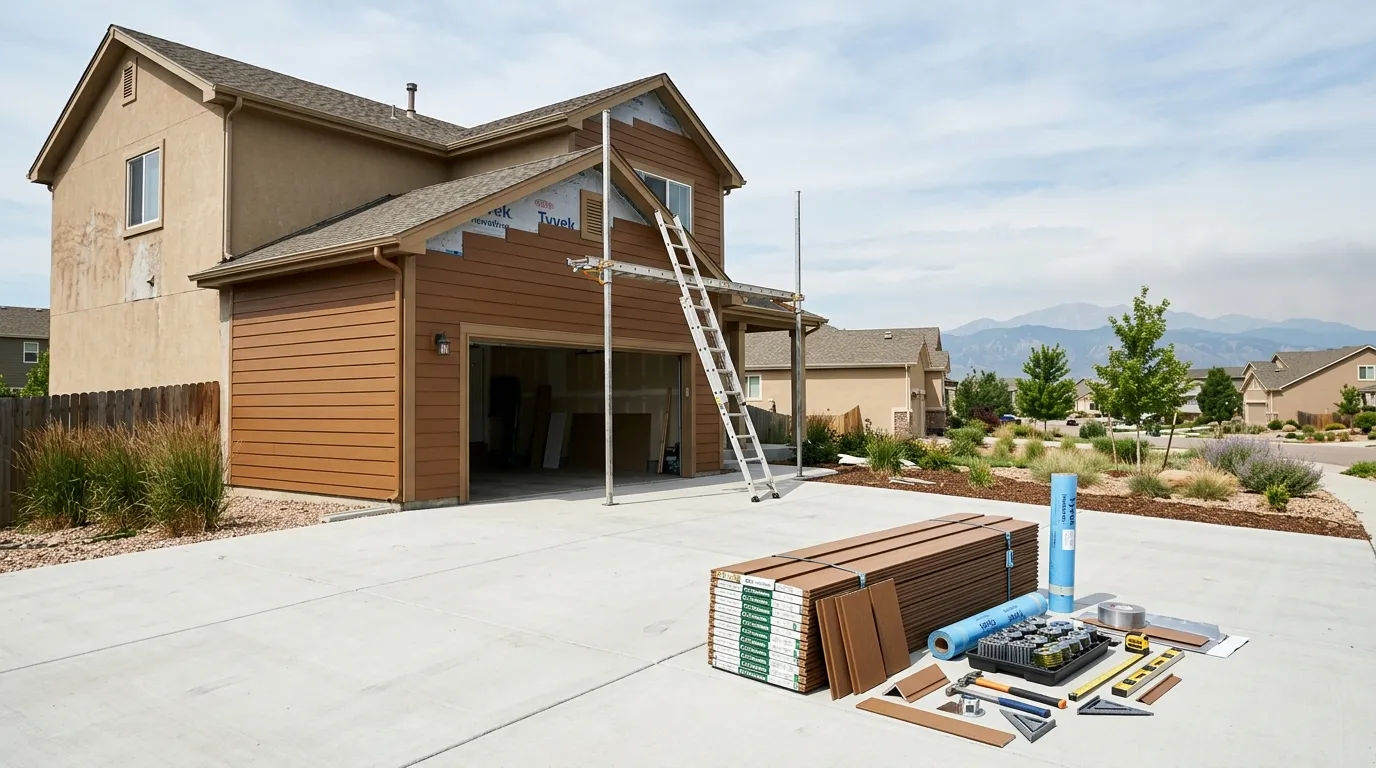
In my world of production and live events, the biggest question is always about the budget. It’s the first thing we lock down before a single piece of gear is rented or a crew member is booked. I’ve learned that a successful project, whether it’s a live stream or a home renovation, starts with a clear understanding of the costs. When homeowners in Thornton ask me about upgrading their siding, I know the real question is: “What’s this actually going to cost me?” My goal here isn’t to sell you anything. It's to give you the same kind of transparent, behind-the-scenes breakdown I'd create for a production budget. Let's pull back the curtain on siding costs so you can plan your project with confidence, especially as we head into the peak summer installation season. ## Average Costs in Thornton Here in Thornton, we have a unique set of environmental factors. Our beautiful Front Range location means intense UV exposure, very dry summer air, and the ever-present risk of embers during wildfire season. This is why so many homeowners are choosing to invest in **wildfire hardening siding options Colorado** has come to rely on. These materials aren't just for looks; they're a layer of defense. Let’s talk numbers. The final price tag will vary, but here are some realistic ranges you can use for initial budgeting: - **Fiber Cement Siding (like James Hardie):** This is by far the most popular choice for fire resistance and durability. For a professional installation in our area, you can expect the **fiber cement siding price Thornton CO** residents see to fall between **$14 to $24 per square foot**. This price typically includes the removal of old siding, the new material, and the complete installation. - **Engineered Wood Siding:** Another durable option with good fire-resistance ratings, engineered wood often costs slightly less than fiber cement, typically in the **$12 to $20 per square foot** range, installed. - **Metal Siding:** Steel or aluminum siding offers excellent fire resistance and a modern look. It's usually priced similarly to or slightly higher than fiber cement, from **$15 to $25+ per square foot**. For a typical 1,500-square-foot single-story home in the Thornton area, a full siding replacement with fiber cement could range from **$21,000 to $36,000**. A larger or more complex two-story home might be closer to **$35,000 to $55,000+**. ## Factors That Affect Price Just like in event production, the final cost is all in the details. A simple stage setup costs less than one with complex lighting and sound. Similarly, several factors can influence your total **fire-resistant siding cost**. - **The Size and Complexity of Your Home:** A straightforward, single-story ranch is less labor-intensive than a two-story home with dormers, multiple gables, and lots of corners. Many of the classic 1950s ranch homes in our area have a simple, long layout, which can help keep labor costs more predictable compared to more intricate modern designs. - **Material Choice:** As noted above, fiber cement, engineered wood, and metal all have different price points. Within fiber cement, you also have options like pre-finished color planks versus primed planks that you’ll need to paint, which adds a separate cost. - **Tear-Off and Disposal:** The cost to remove and legally dispose of your old siding is a major factor. If you have vinyl or wood, it's pretty standard. However, if your older home (especially those from the mid-century or earlier) has materials that require special handling, this can add to the cost. - **Underlying Damage:** The biggest variable. Once my team and I pull off the old siding, we sometimes find hidden water damage, rot, or pest infestations in the wall sheathing underneath. Repairing this is crucial for the long-term health of your home and will be an additional cost that's impossible to quote until the old siding is off. - **Trim, Soffits, and Fascia:** These are the finishing touches around your windows, doors, and roofline. It’s almost always recommended to replace them when you do your siding for a cohesive look and to ensure everything is properly sealed. This will be a separate line item on your estimate. - **Project Timing:** Scheduling is everything. The **siding installation timeline June Thornton** contractors offer is often tight because everyone wants their project done before the late-summer heat and smoke arrive. Booking your project in the spring for a June start is smart, but waiting until the last minute might mean paying a premium or having fewer contractor choices. ## How to Get the Best Value Getting the best value isn't about finding the cheapest price. It’s about making a smart, long-term investment. From my years of managing logistics, I know that cutting corners upfront always costs more in the long run. - **Focus on the Crew, Not Just the Quote:** The lowest bid might come from a less experienced crew. Fiber cement siding, in particular, requires specialized tools and training to install correctly to maintain its warranty and performance. Ask about the crew’s experience and certifications. - **Think Long-Term ROI:** High-quality, fire-resistant siding can sometimes lower your homeowner's insurance premiums. It also significantly boosts your home's curb appeal and resale value. This initial investment pays dividends over time. - **Plan Ahead for Peak Season:** Don't wait until May to start calling for a June installation. Begin getting quotes in the late winter or early spring. This gives you time to vet contractors properly and get on their schedule without being rushed. A well-planned project runs more smoothly and often stays on budget. - **Bundle Your Exterior Projects:** If you're also considering new windows or a roof, ask your contractor if they can manage those projects as well. Bundling can sometimes lead to savings on labor and project management fees. ## Questions to Ask Your Contractor Before you sign any contract, you need to be an informed client. Think of this as your pre-production meeting. Here are the essential questions to ask: - Is the quote all-inclusive? Does it include tear-off, disposal, permits, materials, and labor? - How do you handle unexpected costs, like repairing wood rot? - What is the specific brand and type of siding and trim you will be using? - What is the warranty on the materials and on your workmanship? - Can you provide proof of liability insurance and workers' compensation? - What is the estimated project timeline from start to finish? - Who will be my main point of contact on-site during the installation? An experienced, trustworthy contractor will have clear, confident answers to all of these questions. If you get vague responses, it’s a red flag. Choosing the right siding is a big decision, but it's one of the most impactful upgrades you can make for your home's safety and value here in Colorado. By understanding the costs and asking the right questions, you can approach the process like a pro. For a personalized estimate and a detailed project plan for your Thornton home, contact my team at **Bettawayz Production LLC** for a free consultation.
Read More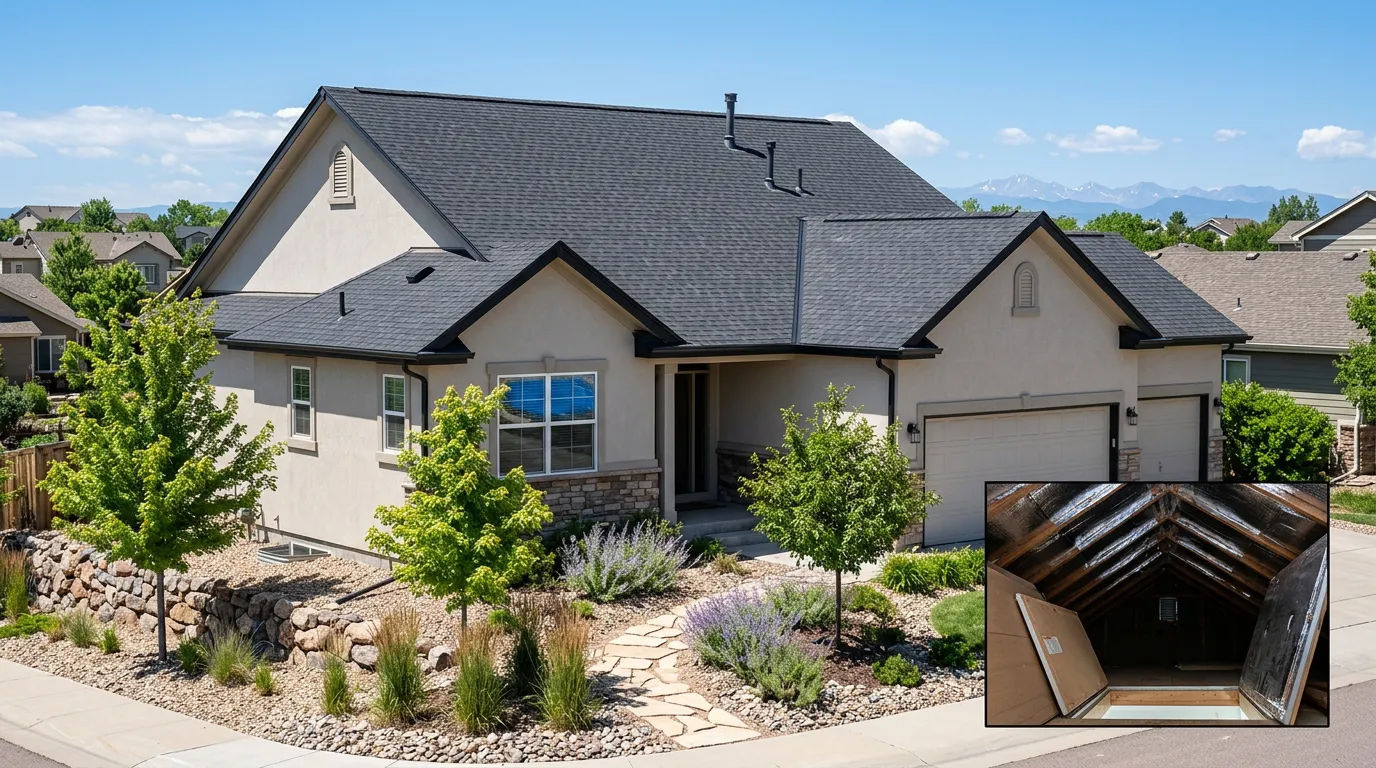
As a Senior Production & Event Operations Specialist with **Bettawayz Production LLC**, my world revolves around flawless execution. Whether it’s a live stream or a corporate event, success is about what happens behind the scenes: meticulous planning, the right team, and anticipating challenges before they arise. It turns out, the same principles apply to transforming a home. This past spring, we got a call from a family in Thornton living in a beautiful, sprawling home from the late 1990s. While they loved the house's character and complex, multi-gabled roofline, they were dreading the approaching summer. Their second story became an oven by 3 PM every day, no matter how hard their air conditioner worked. The upstairs bedrooms were unusable for afternoon naps, and the constant drone of the A/C was driving up their energy bills without providing real comfort. They were facing a classic Colorado problem: intense, high-altitude UV radiation turning their attic into a giant radiator, baking the living space below. They knew they needed a solution before the peak July heat arrived, and they reached out to **Bettawayz Production LLC** for help. ## The Assessment When my project lead and I arrived for the initial inspection, it felt like stepping onto a new 'set' - one with its own unique technical challenges. The homeowner’s description was spot-on. As soon as we climbed the ladder into the attic, a wave of stagnant, super-heated air hit us. Our thermal camera confirmed our suspicions, showing surface temperatures on the underside of the roof deck already soaring, even on a mild late-spring day. The home’s 'Neo-eclectic' design, with its many peaks and valleys, created a massive surface area for soaking up the sun, but the original ventilation system was woefully inadequate for the job. Here’s what our comprehensive assessment uncovered: - **Blocked and Insufficient Soffit Vents:** The original soffit vents were small, sporadic, and many were clogged with old insulation and debris. This effectively choked off the attic's primary air intake, preventing any kind of natural airflow. Without cool air entering at the bottom, the hot air at the top had nowhere to go. - **No Radiant Barrier:** The underside of the roof sheathing was bare wood. All the radiant heat generated by the sun hitting the shingles was being transferred directly into the attic space. In Thornton, where the summer UV is notoriously strong, the lack of a radiant barrier is a major performance gap. - **Inadequate Air Sealing:** We identified numerous gaps and cracks in the attic floor - around light fixtures, plumbing vents, and the attic access hatch itself. This was a double whammy. It allowed expensive, conditioned air from the living space to leak up into the attic, while simultaneously letting super-heated attic air infiltrate the home. This is a common issue we address with **air sealing attic Colorado mountain home** solutions. The diagnosis was clear. This wasn't just a ventilation problem; it was a total attic system failure. The house needed a complete **attic cooling retrofit** to manage the intense thermal load. ## Our Solution Back at the office, we mapped out our production plan. A project like this requires a synchronized, multi-step approach, much like coordinating different crews for a live event. The goal of our plan for the **radiant barrier installation case study Thornton** was to create a comprehensive system where each component worked together. The expert installation team at **Bettawayz Production LLC** was ready to execute. The project was scheduled over three days to ensure each step was completed with precision. Here’s how our crew tackled it: 1. **Preparation and Air Sealing:** Day one was all about prep. The crew carefully moved the existing insulation aside to get a clear view of the attic floor. Using specialized foam sealants, they meticulously sealed every penetration point between the living space and the attic. This critical first step immediately stopped the 'chimney effect' of conditioned air loss. 2. **The Ventilation Overhaul:** On day two, we addressed the airflow. Our team performed a full **soffit and ridge vent upgrade Thornton CO**. They removed the old, ineffective vents and installed a continuous baffled soffit vent system along the entire lower edge of the roof. This ensures a constant, unimpeded path for cool air to enter. Simultaneously, they installed a new, shingle-over ridge vent at the roof's peak. This combination creates a powerful thermal convection current, constantly pulling cool air in from below and exhausting hot air out the top. 3. **Radiant Barrier Installation:** The final piece of the puzzle was tackling the radiant heat. On day three, our certified installers stapled a high-performance, double-sided reflective radiant barrier to the underside of the roof rafters. This material acts like a mirror for heat, reflecting up to 97% of the sun's radiant energy back out of the attic before it can heat up the space and the insulation below. This step is the game-changer for homes under the intense Colorado sun. Throughout the process, I ensured the homeowners were kept in the loop with daily progress updates. For us at **Bettawayz Production LLC**, communication is just as important as the quality of our work. ## The Results The 'final cut' of this project was incredibly satisfying. Even before our crew packed up their tools, the difference was palpable. The homeowners reported that for the first time, their second floor felt just as cool as the first. The A/C unit, which used to run almost non-stop, was now cycling on and off normally, even during the warmest part of the day. We took some 'after' measurements to quantify the success: - **Before:** On a 90°F day, the attic temperature was previously recorded at over 155°F. - **After:** On a subsequent 90°F day, the new attic temperature peaked at just 105°F - a **50-degree reduction**. This dramatic drop in attic temperature meant the insulation was no longer fighting a losing battle against a ceiling of heat. The entire home was more stable, more comfortable, and significantly more efficient. The homeowners were thrilled, not only with the immediate comfort but also with the prospect of lower summer utility bills. They told us their home finally felt balanced and that the peace and quiet from the A/C not running constantly was a huge bonus. Delivering that kind of tangible result is what makes every project at **Bettawayz Production LLC** so rewarding. ## Conclusion Just like a successful event production, this attic transformation was a story of identifying the core problem and executing a coordinated, expert solution. By treating the attic as a complete system - addressing airflow with new vents, stopping leaks with air sealing, and blocking heat with a radiant barrier - we were able to deliver a permanent solution to summer discomfort. This project stands as a perfect example of how the right behind-the-scenes work can lead to a spectacular and comfortable result for the homeowner. Ready for your own **Bettawayz Production LLC** experience? Contact us today for a free inspection.
Read MoreNo pressure. No obligation. Just an honest assessment from a team you can trust.